How to Pull Focus: A Focus Puller's Guide to Marks, Charts & LiDAR
Pulling focus is part math, part muscle memory. Learn how to set marks, read a focus-pull chart, measure distance fast, and hand clean numbers to your crew.
A focus pull is one of the hardest crafts on set: keep a moving subject sharp while the camera, the actor, or both are in motion — often wide open, where the sharp zone is centimetres deep. This guide covers how focus pullers actually work: setting marks, reading the depth envelope, measuring fast, and sharing clean numbers with the team.
What “pulling focus” actually means
The 1st AC (focus puller) rides the lens during a take, shifting focus to follow the action. A pull is a planned change of focus from one point to another — say, from a foreground actor to someone entering in the background.
The challenge is that depth of field shrinks dramatically with fast lenses. A 50mm at T2 on full-frame can give you well under a metre of sharpness. Miss your mark by 20 cm and the shot is soft on a cinema screen.
Step 1: Set your marks
Marks are physical or measured reference points for where focus needs to be at each beat of the action.
- Floor marks — tape on the ground for where the actor lands.
- Distance marks — the focus distance for each beat (e.g. 1.8 m → 3.2 m).
- Witness marks — points on the lens barrel itself.
The cleaner your distances, the cleaner your pull. Which means you need accurate measurements — not estimates.
Step 2: Measure distance fast
Old school is a tape measure from the film plane. Faster, on iPhone Pro, is LiDAR: point at the subject, read the distance, and lock it straight into your calculator.
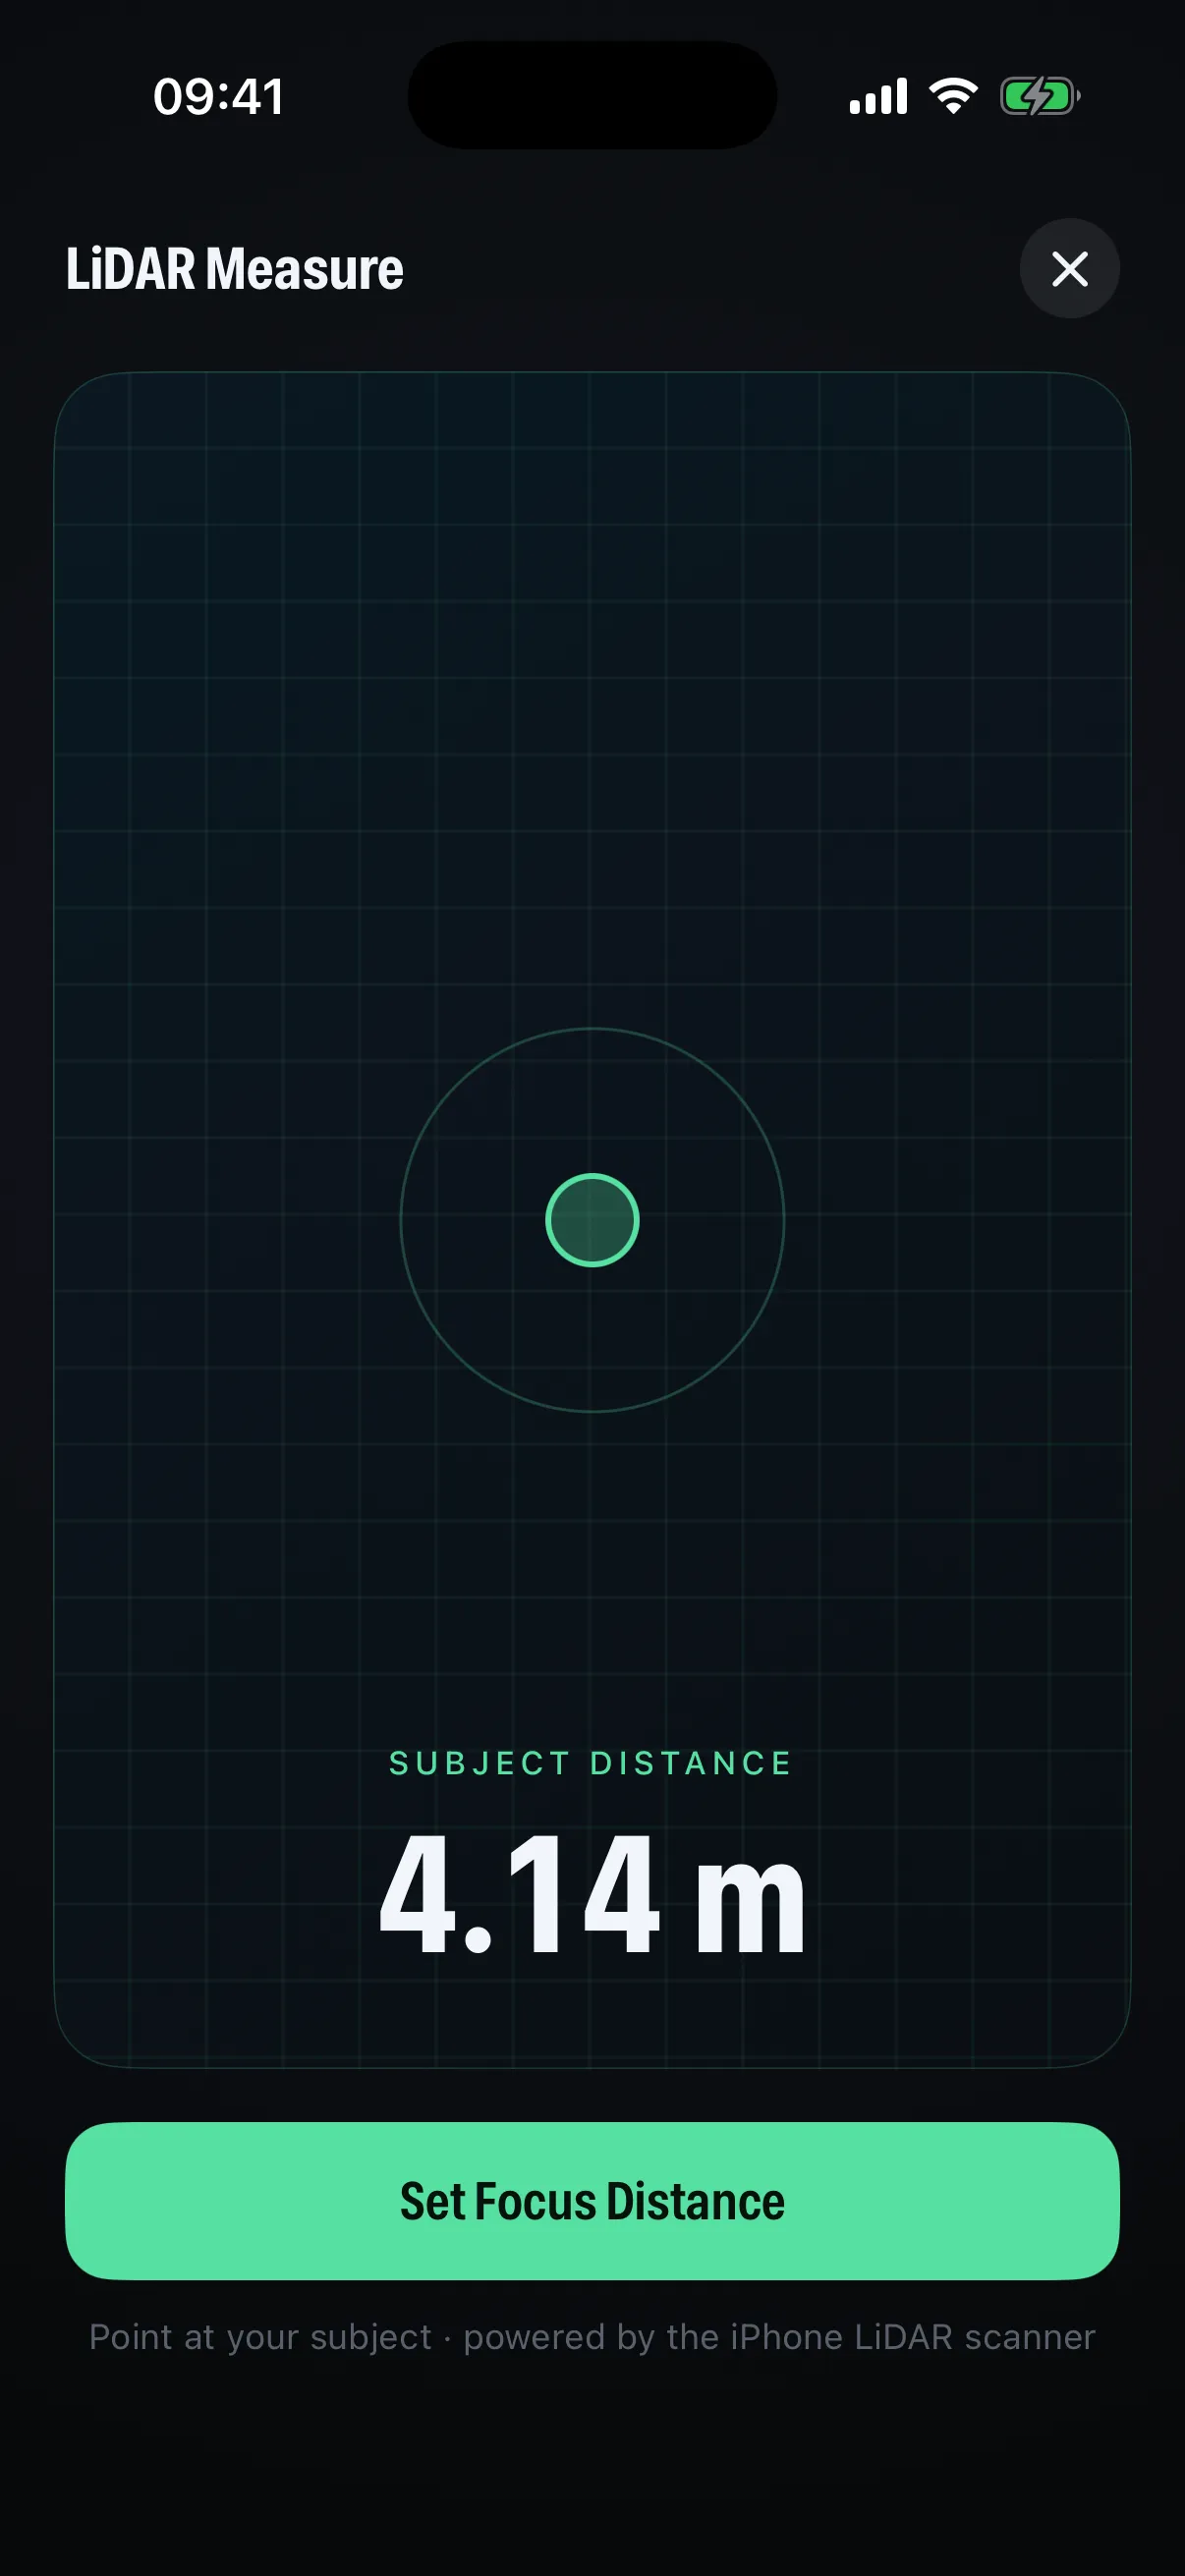
Measure both ends of your pull and you have your start and end marks in seconds — no assistant holding the dumb end of a tape.
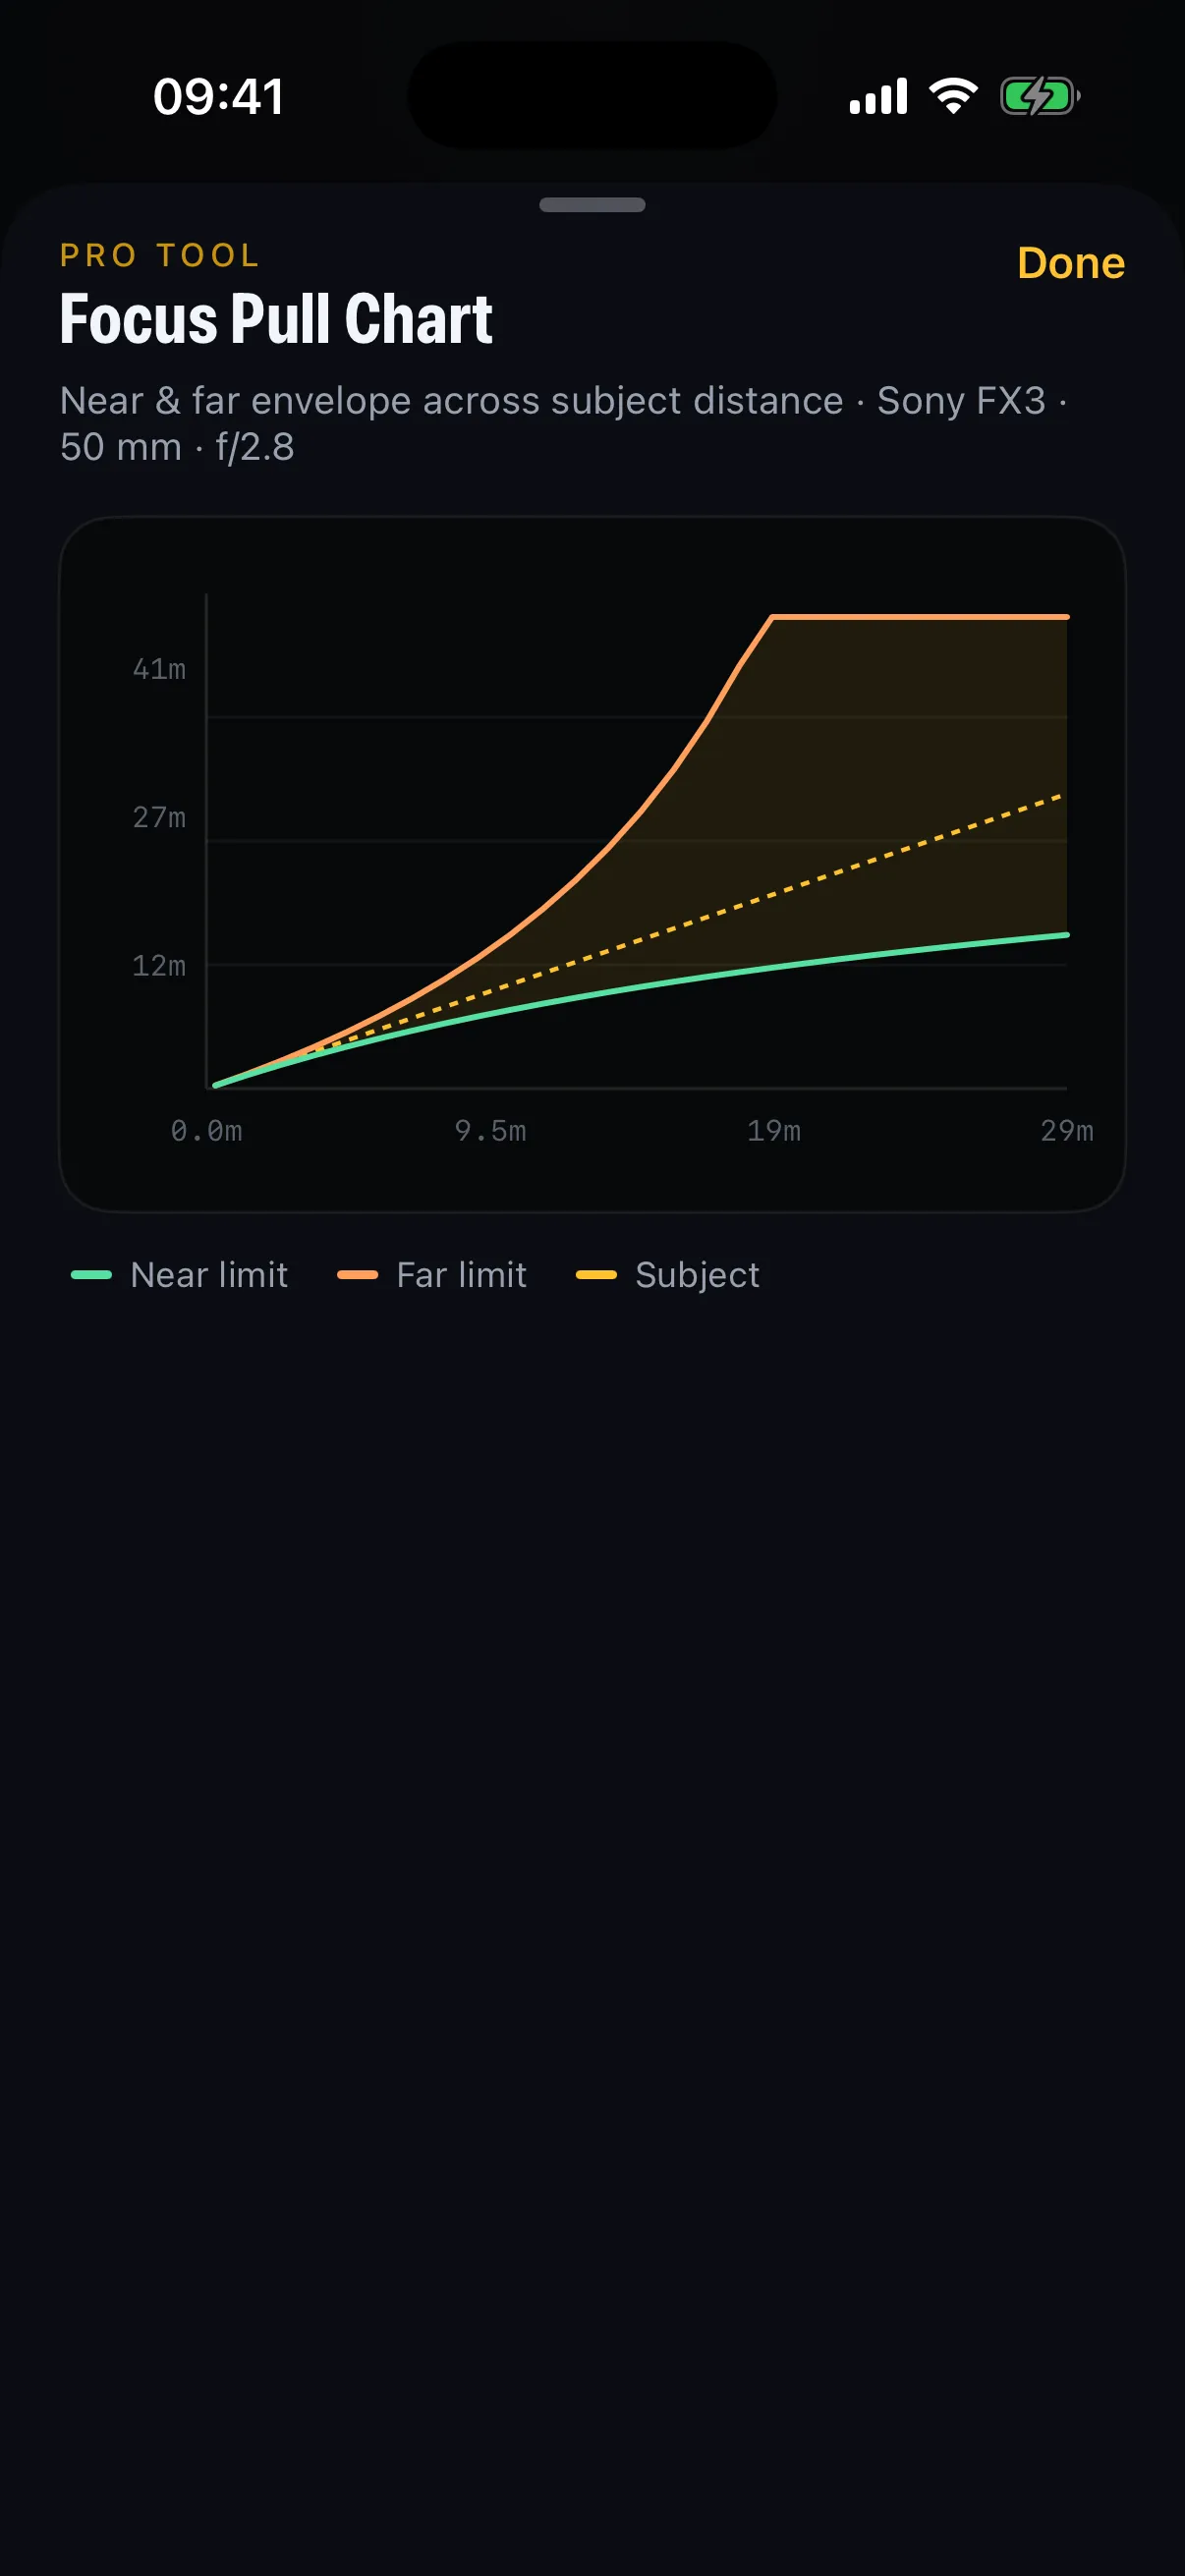
Step 3: Read the depth envelope
Here’s where planning beats reflexes. Across a pull, your near and far limits move as focus distance changes. A focus-pull chart plots that envelope so you can see exactly how much margin you have at every point in the move.
The chart shows three lines:
- Subject — where you’re focused.
- Near limit — the front edge of sharp.
- Far limit — the back edge of sharp.
Where the near and far lines sit far apart, you have breathing room. Where they pinch together — typically up close, wide open — you have almost none, and that’s where pulls go wrong. Knowing this before the take tells you where to be most precise.
Step 4: Build a shot card for the crew
Once your numbers are set, the whole team needs them: the DP, the operator, the director. A shot card packages the setup — camera, lens, T-stop, focus marks and the near/DoF/far breakdown — into one shareable card, often with a QR code so anyone can pull it up instantly.
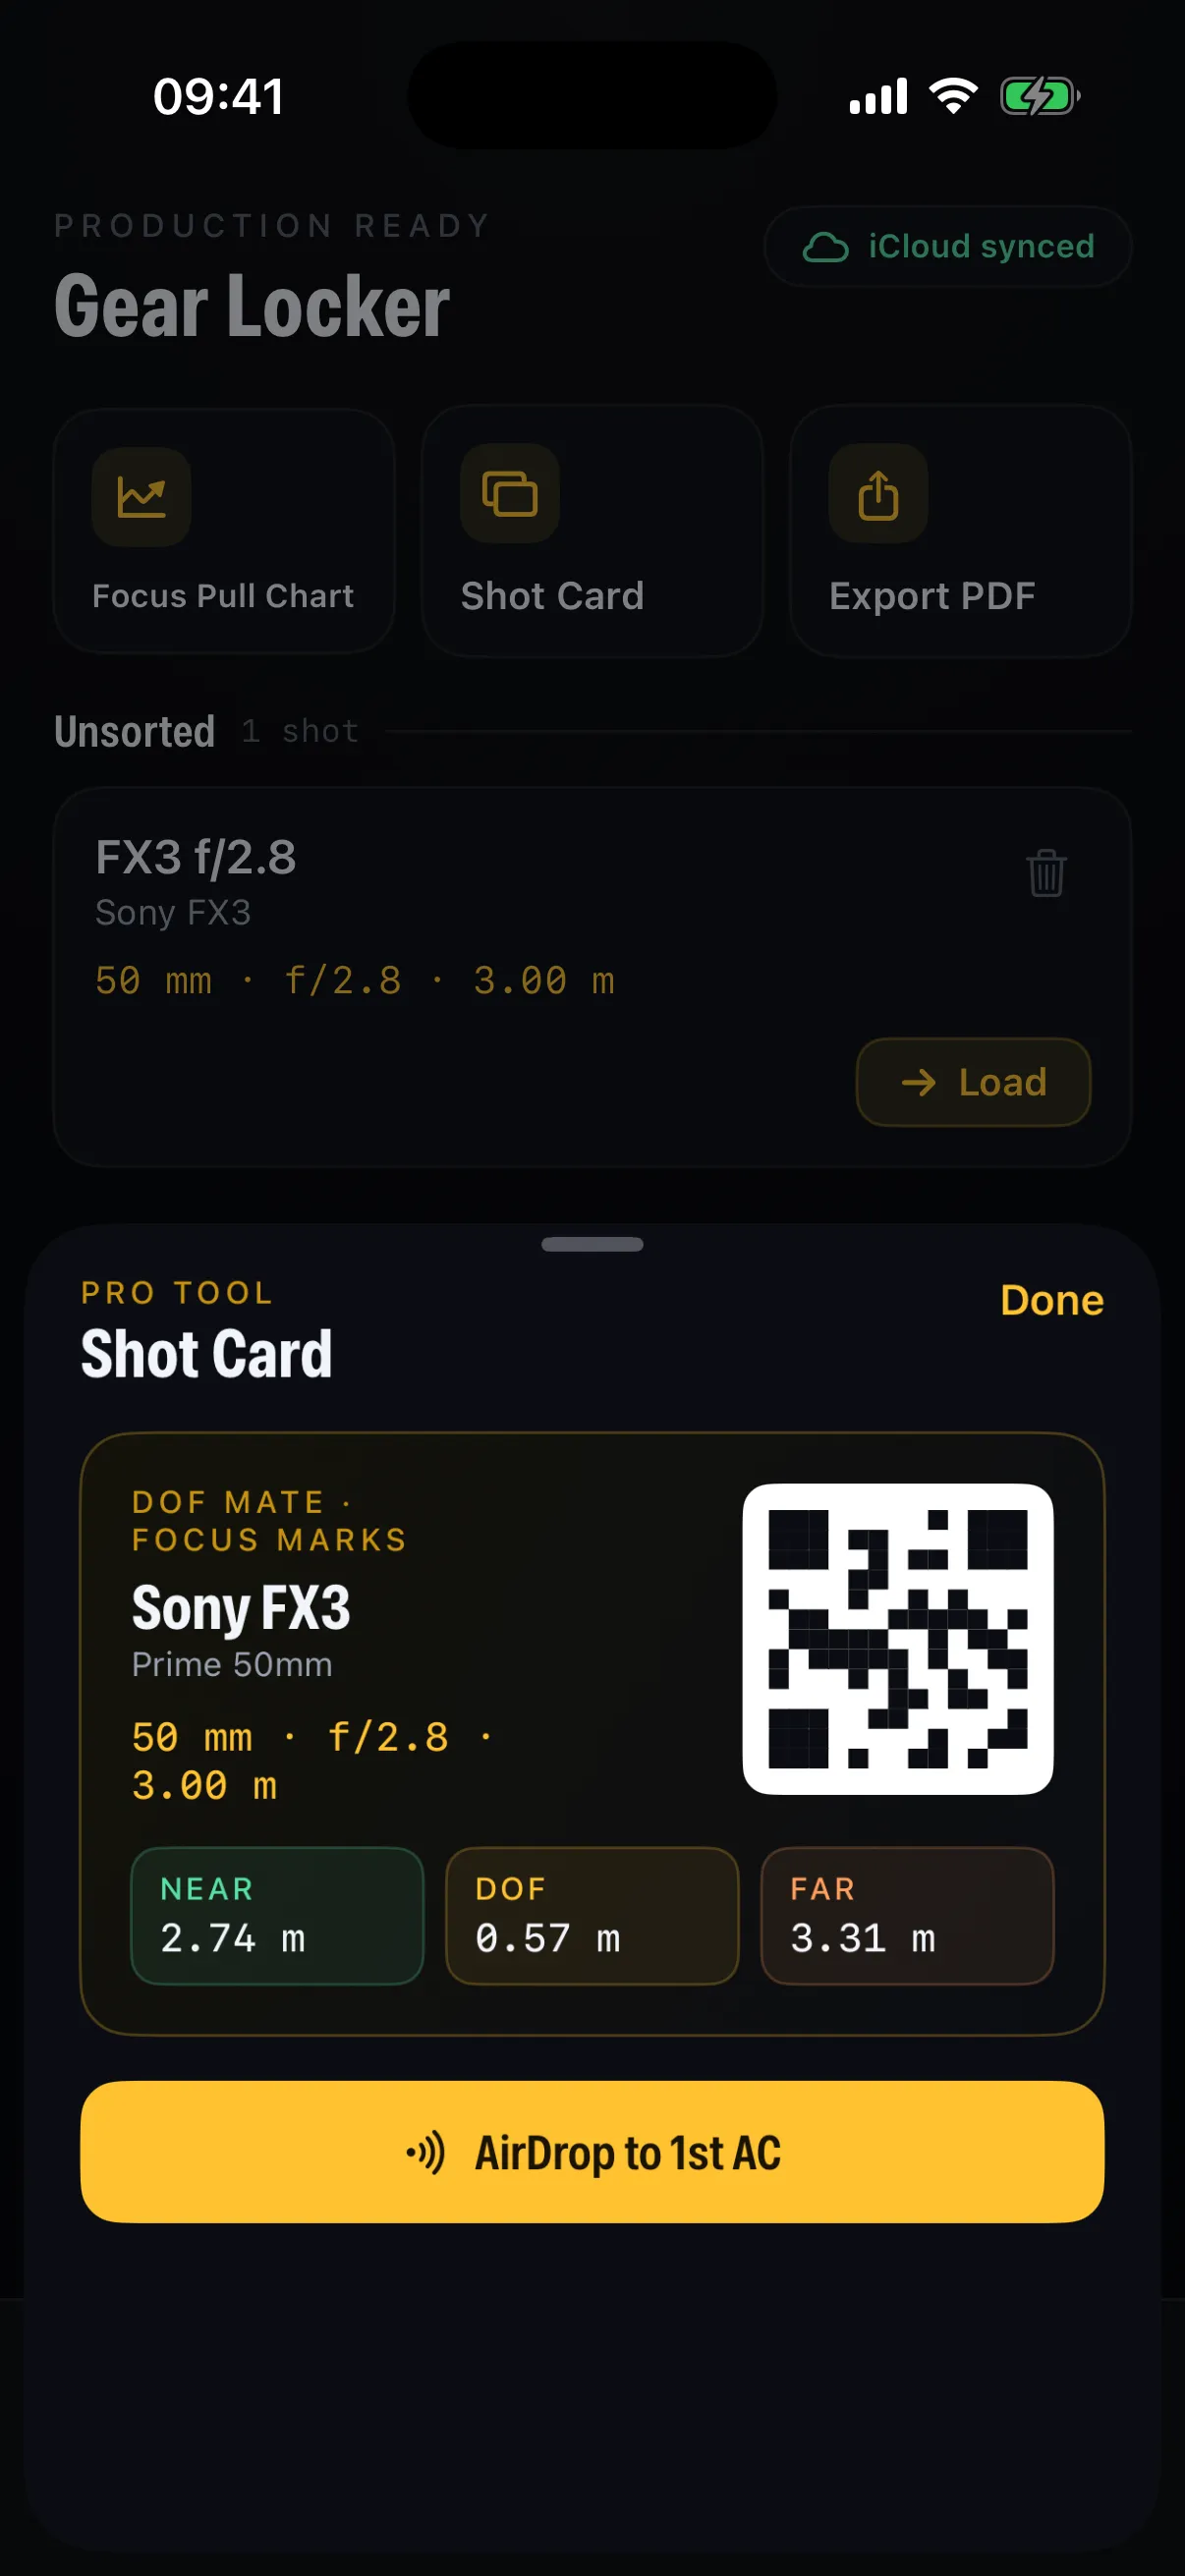
AirDrop it to the 1st AC and everyone is working from identical numbers — no shouting distances across the set.
Pulling focus well: a short checklist
- Rehearse the move before the take, dry, on the gauges.
- Trust your marks over your eyes when wide open — the monitor lies at small sizes.
- Anticipate, don’t chase. Start the pull a hair early; focus should arrive with the subject.
- Account for delivery. A pull that reads sharp on a 4K monitor may not hold for an 8K finish — set your circle of confusion to match.
- Keep margin where the envelope pinches. That’s where you’ll miss.
From estimate to instrument
You can pull focus by feel, and great ACs do. But the best are also relentless about numbers — because numbers are what let you plan a pull instead of react to it. DoF Mate turns your iPhone into that instrument: LiDAR distance, a live focus-pull chart, and shot cards you can hand to the crew. Start with the depth of field fundamentals if you want the theory behind the marks.